Clumner Bluff
Date: 1st November 2019 Summit: 1458m

Views from Clumner Bluff. Photo Credit: With thanks to Ben Young.
With plans for the long weekend away tackling Agamenmon and Philps Peak scuttled by unfavourable weather in the south of the state a friend and I looked closer to home for a day trip that could include an Abel or two. The best weather was forecast for the Friday before the long weekend and after that it was a downhill slope of thunderstorms, high winds and snow forecast. Let's be adventurous we thought - why not attempt Clumner Bluff, Mersey Crag and Turrana Bluff as a long day trip from the west? Like all well made plans they often go astray, but we are probably now the only two people (silly enough!) to have summited Clumner Bluff twice in one day and from both its western and eastern face!
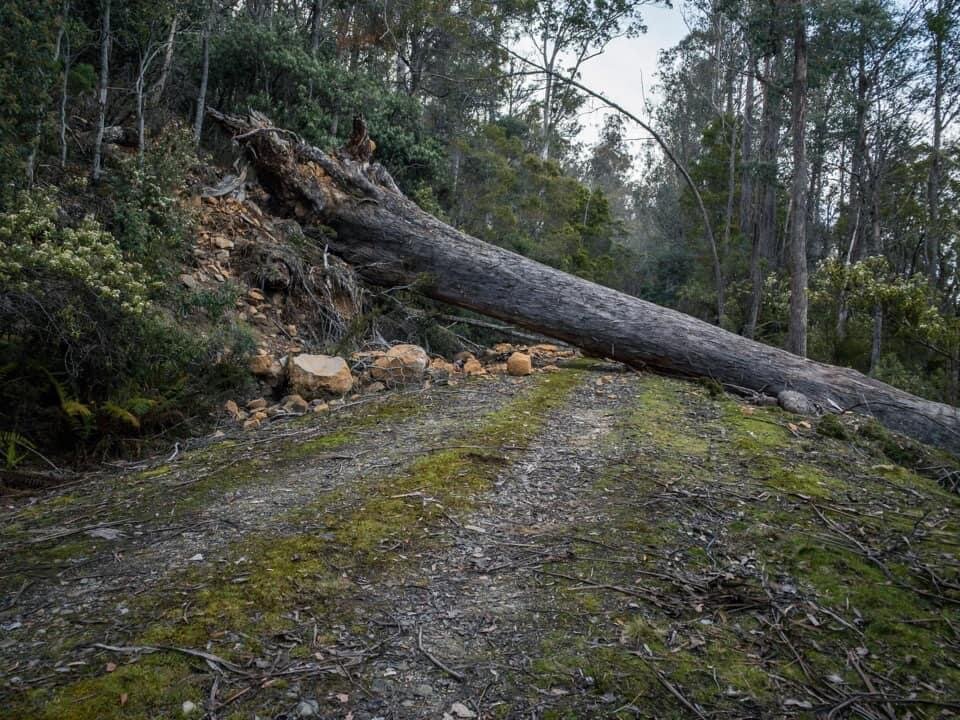
Skidder not chainsaw needed!
Given we were attempting such an ambitious day we wanted to be on foot early and had parked in front of the large fallen tree across Fish River Road by 7:30am. In hindsight starting on the trail around 5am would have been better! Thunderstorms were forecast to hit around 5pm and we wanted a good 12 hours of hiking time up our sleeves. Error #1 for the day. We were already scaling back our plans at this stage to just Clumner Bluff and Mersey Crag - Turrana might have to wait for another day. We packed the chainsaw into the Mazda in the hope of removing the fallen tree we were knew was blocking the access road, but upon arriving realised it would take a log skidder to remove it! Times like this we miss Forestry maintaining our roads!
If not for this blockage one could drive further up the Fish River Road saving a few extra kms of steep hiking and 240m of elevation. But without a skidder in the Mazda it was time to crawl under the tree and locate the cairn and ribbon indicating the start of the trail. From the very first few steps the climb was solid.
The initial route climbed steeply up through the encroaching bush via an old snig trail. Having summited Drys Bluff two days earlier our legs were certainly feeling the sharp rise in elevation! Dried leaves, intermittent rock patches and very low scrub made the walking easy (albeit for the steepness), as did the frequent ribbon markers as no energy needed to be expended on navigation.
We were climbing quite quickly mindful of our plan to get over to Mersey Crag later in the day and were stepping out onto the higher point of Fish River Road where it loops back on itself in 20 minutes. There was a large cairn here indicating the next entry point but it was obvious from the well padded area where we would continue on regardless of the cairn.
The climb upwards from the second road was pretty unrelenting. It was like a slightly milder version of Drys Bluff, or perhaps it just felt like that was as our legs hadn't really rested from Drys! I particularly hate contouring - I can't see the point of wandering around in circles gradually getting to the top when you can put in some hard work and chose a straight up route. Clumner puts the 'straight up' in 'straight up' so I was pretty pleased. Making rapid time to top of Clumner, Mersey Crag was looking promising.
The skyline began to open gradually above us as we stepped out of the denser canopy, the elevation levelled out noticeably and the ground changed to larger rock and stone. Both of us were glad for the summer sun and dryness of the rocks as evidence of black lichen was all over the rocks indicating a slippery trip in the wetter months.
Up to this point, even with the elevation, we made exceptionally good time. But then.... the views opened up and we could not help but stop every so many metres and turn and just soak up the glory. Boy is it spectacular! First we glimpsed Barn Bluff through the trees, then a snow-capped Cradle Mountain appeared. And every step we climbed higher the magical views increased. We could see Ossa, Cradle, Barn Bluff, Pelion West, Pelion East and Lake Rowallan like a pool of crystal clear floating in the foreground. Wow, just wow. Our appetites for the view from the summit renewed the energy in our legs! It was also at this time we glimpsed our destination - the imposing western face of Clumner Bluff through the trees.

The first and smaller scree field. Photo Credit: With kind thanks to Simon Kendrick.
It was with some measure of excitement that we reached the scree fields. From here we would have no trees blocking the mountainous views and as an added bonus we could enjoy a little rock hopping. The scree field is a very decent size but with a well-cairned route not difficult to negotiate. The steepness does not diminish at the scree and we agreed that we did not want to be returning down this mass of scree in the dark with only head torches later on. We would adjust our turn around time to ensure we were back off this field before night fell. Now not shaded at all and with the sun high and intense we were rapidly depleting both our water and sunscreen supplies. No matter - we could refill water at the other side of the summit plateau.

The generous sized scree field leading to the breach in the rim. Photo Credit: With kind thanks to Simon Kendrick.
Even though the large scree field was composed of mostly easy to climb rocks, the sheer size of it, combined with the steep gradient meant we were digging deep to reach the summit. With uninterrupted views behind us now it was so tempting to frequently stop for a photo or two, or to just enjoy the place in which we were standing. The weather gods were putting on their best behaviour for us thus far. Cresting the first section of the boulder field we could now spy high above us the notch to the left of a rocky outcrop in the summit rim that we would climb out onto the rim at.
As the very last pinch to the rim approached so did a small amount of exposure in the form of larger boulders to be negotiated and steeper drops between them. I was certainly holding on tight. Ben on the other hand was loving the scree, the heights and the drops - like a sturdy male ballerina hoping around! I was more like a small bug using all its limbs to climb! The we were rim side! Yay! Hauling ourselves up and onto the rim and straight to a substantial cairn. I have seen many a blog post with "summit" pictures at this particular cairn but alas it's not quite that easy.
The true summit with its distinct cairn lies to the southern end of the plateau about 400m away. Even though we were planning on descending down the eastern face at the northern end of Clumner Bluff we would make sure our hands rested on the true summit cairn for prosperity! We first headed to the northern end of the plateau to visit the secondary cairn there and spy possible routes downwards. We then headed south towards the highest point of the mountain.
On the summit plateau. Photo Credit: With kind thanks to Simon Kendrick.
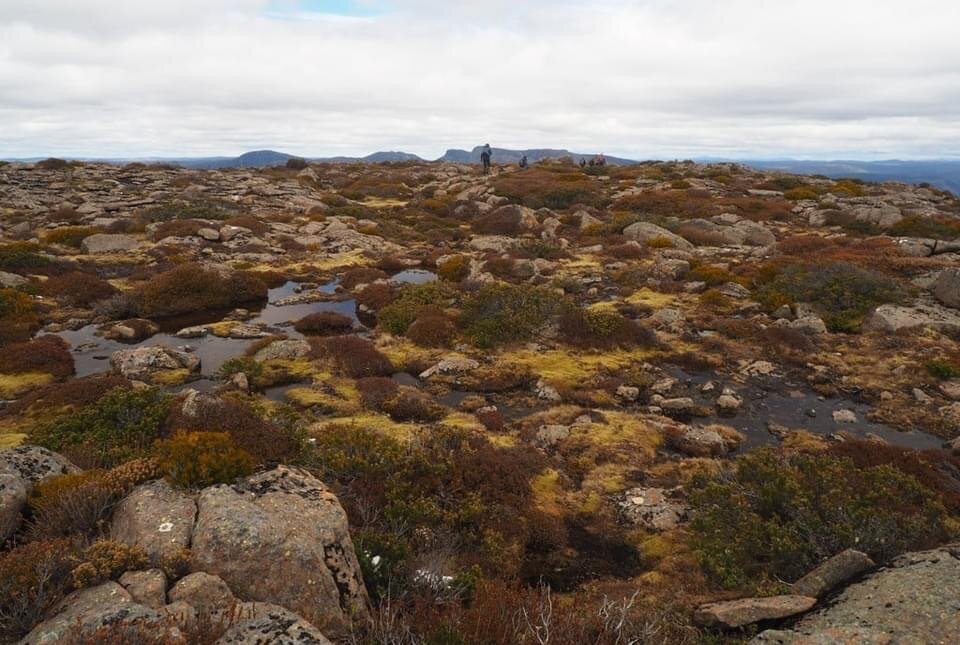
The views from the norrthern end of the Clumner Bluff plateau were just as spectacular as the views from the summit. A small cairn at the very northern tip is a great spot to gaze out towards the mountains littering the Overland Track. We passed a weird metal "something" on the way over and couldn't for the life of us figure out what it is? (If anyone can enlighten us please do so by leaving a comment!). Filling up the camera roll and our happiness jar with the views we set off to the southern end of the mountain. We had climbed all the way up - best make sure we get to the actual summit cairn!
Off to the southern most tip we headed. Pleased with our timing so far, Mersey Crag was still an option at this stage and it was time to officially bag Clumner, then start the real untracked adventure for the day. I had pre-marked map and compass bearings to hopefully bring us easily and safely down of the plateau on the eastern side. But first things first, the official summit cairn must be touched!
And there we were. In just shy of 2.5 hours from the car we were at the large and unique triangular based summit cairn of Clumner Bluff. And what a beautiful day to enjoy the mesmerizing views on offer. In fact, the views would turn out to be too mesmerising and we would lose an hour on the summit just wandering around gasping at the sheer beauty in each direction. This hour and the hour we lost starting late would cost us dearly from here but you know what - the views were totally worth it! From here one would just retrace their steps down the mountain, drive off into the sunset upon reaching their car and enjoy the photos.
We however had something else planned. An adventure towards Mersey Crag awaited us and this following section includes our trek to within 3km of its summit and a second climb of Clumner Bluff but up its eastern face.
Mersey Crag from the summit of Clumner Bluff...
Our planned adventure was to summit Clumner Bluff (quickly), descend down on the eastern side towards the plateau between Clumner and Mersey Crag and then summit Mersey Crag followed by Turrana Bluff. It was ambitious, but doable with the right conditions. We summited Clumner quickly but then lost over an hour soaking in the views. However, the sky was still clear at this stage so Mersey Crag - if not Turrana now - was still on the table.
Even though a descent from the summit of Clumner Bluff from the northern end would have been easier we were concerned we were losing too much time and could ill-afford the walk across back across the plateau. So after a few minutes recon, I located a break in the rocky cliff line and a valley descending from the eastern side of Clumner that I felt we could safely negotiate down. A mixture of large boulders, small cliffs, dense scrub and varying gradients of steepness bought us eventually down to the small tarns at the base of the mountain.
When planning our route between Clumner Bluff and Mersey Crag the night before, I had mentioned that I wanted us to stay well away from the rockfall to our south and on the central part of the ridge between the two until almost at Mersey Crag.
I figured it would be quicker moving through low alpine scrub (which is what the latest satellite photos showed) than over unknown rockfall. It would also allow us to use the relative flatness of the plateau to our advantage and avoid climbing up and over all six of the knolls appearing on the map along our journey to Mersey Crag. It was a great plan; we should have stuck to it and my map notes and bearings, but we didn't and it cost us dearly in wasted time and energy expenditure!
Refilling our water bottles with the crystal clear water from the deep and fast flowing creek at the base of Clumner Bluff (eastern side) we started our trek across the plateau to Mersey Crag. For some unknown reason we ignored our own advice to ourselves the night before, and headed straight for the first rocky knoll, instead of skirting around it! We repeated this stupidity for the next two rocky knolls. While this allowed for the spectacular views to continue it wasted time and energy climbing up and then down constantly! Finally, after the third time I had a minor tantrum and refused to go any further unless we took our own advice but alas by then it was too late!
Finally taking our own advice and ignoring the greedy little view monsters within us, we headed down towards the low alpine scrub in the saddle. Mersey Crag was directly in front of us approximately 3km away. It was so tempting to push on but we had met our first safety turn around point. We could have ignored this cut off and still made it back to the car, but we would then be negotiating Clumner's western scree face in the dark, not something I was enthused about.
The forecast thunderstorm was also due to hit around 5pm and we were at least 1-1.5 hours from the summit of Mersey which would have put us right in its path! Oh well, at least we would get to summit Clumner from its eastern face on the way home for something different. We waved good bye to Mersey, quickly ate a late lunch and then turned for home. A few steps into the return journey storm clouds gathered overhead and a few spots of rain dropped. We had made the right call. Of course, a few minutes later it stopped and the sun came out!
Once the decision was made to turn around we got to use the extra time to play in the beautiful tarns on the plateau. The creeks and tarns sprinkle the plateau and littered with snow it made a very pretty sight indeed. We also returned to our original plan of using the low lying scrub, flat plateau and total avoidance of the knolls to our advantage and the walking was easy! We now have a quick and flat route to Mersey Crag next time we attempt this wander.
So quick was the return journey through the low alpine scrub dotted with Pencil Pines we were able to enjoy more than a few moments laying in the recently shinning again sun by the creek relaxing before tackling our second ascent of Clumner for the day. Whilst relaxing we picked our path up to the summit towards the northern end of the mountain (we had descended towards the southern end). We took a compass bearing of a grass path half way up the mountain and would stick to that. Below this grassed area was a manageable scree field and above it a notch to re-enter the mountain's rim. The route was short and not particularly steep from our vantage point.
It was surprisingly easy and exceptionally quick to summit Clumner Bluff from the eastern side. Taking us under an hour from the base of the mountain and with no difficulty encountered at all. Bonus! A short walk southwards along the rim then bought us back to the cairn marking the exit point off the top of the mountain and the walk back to the car.
Our legs were weary after nearly 17km thus far, but our minds were racing with thoughts of our next adventure here. We take away the knowledge of the best route to Mersey Crag from Clumner with us and an adventure that allowed us to summit the same mountain twice in a day from different sides. And, of course, the magical and wondrous views that we indulged in.
The stats.
Distance: Approx. 12 km out-and-back to the summit. (Note our 20km return trip included side trips towards Mersey Crag)
Time taken: 4.5 Hours return.
Difficulty: Moderate. Navigation is easy but the climb is solid and a large steep scree field must be negotiated.
Type of track: Well marked with cairns, ribbons and padded trails.
Access from: Fish River Road. Note the last few kilometers of Fish River Road is rough fire trail.

Route taken to Clumner Bluff (and then Mersey Crag attempt).