Mensa Moor
Date: 9th June 2019 Summit: 1365m
Tackling this Abel had been on my list for some time. However, discussions with friends who had previously ascended Mensa Moor yielded not a single positive virtue. Only stories of long days, exposed hiking, nasty scorparia fields and generally negative, bordering on offensive, reviews. Even the good book mentions that it should only be attempted by experienced walkers. This didn't fill me with enthusiasm! Nevertheless it was on the list of Abels to tick off and the last remaining Abel in the north-east for me to summit.

High on the Mensa Moor plateau. Photo Credit: Haydyn Bevis
My research on Mensa Moor indicated that everyone who had previously embarked upon this Abel had taken the commonly hiked route from the ski village at Ben Lomond National Park, accessed from the east. In other words - the long way round. Untracked, lengthy, and exposed, but according to the accepted view it was also the "easy" way - if the word easy can ever be used to describe Mensa Moor! It is also commonly attempted during the longer summer days, unless one is prepared with overnight shelter, given the time taken to the summit and the exposure you are subjected to en route.
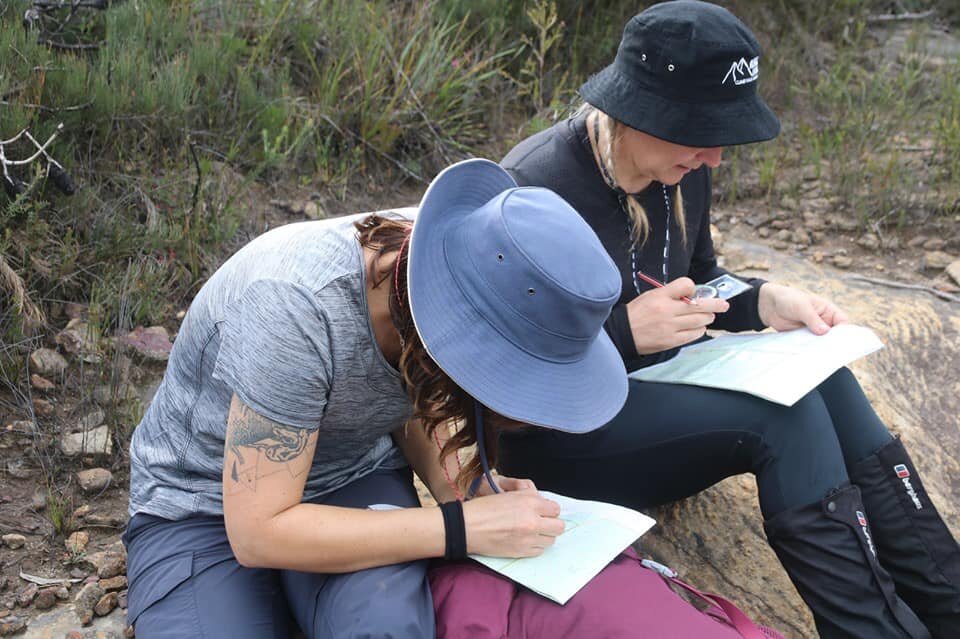
A friend and I in NSW undertaking our navigational course with Ashley at MountainSphere Adventures and Education.
Before I can continue with this trip report, I need to share some background information. A few months prior to our attack on Mensa Moor, I had headed off to the Blue Mountains to complete a beginner navigation course, in the hope of slowly increasing my knowledge and experience in map and compass reading. This with the aim of becoming better prepared for off-track hiking and the many more ambitious Abels still to come. On return from the Blue Mountains I became more than a little interested (read: obsessed) in seeing if any Abels could be conquered without following the usual routes. Mensa Moor provided my first opportunity to test my newfound skills. If everyone hates the official untracked route, why not try a different route? One of my own creation!
So out came the map and compass and I started to look for the possibility of alternate ascents. On perusal of the map it seemed that a western attack could be possible. Just because I was not aware of it being done before, doesn't mean that it can't be done. The first issue I would face would be how to gain access by road to the western side of the mountain. A reconnaissance trip was planned!
I set off in the Mazda that same afternoon - car loaded up with snacks and maps! After more than a few hours of U-turns, rough fire trails and many a dead end, my perseverance finally paid off and I had found a driveable route that bought me to the western side of the Mensa Moor plateau, approx. 5-6km away from the summit, as the crow flies. First problem solved - getting access to the western side of the mountain. I popped on my boots and had a brief wander into the scrub to check out the terrain. The bush was understandably dense as it is untracked and there was a large creek to cross. Nothing insurmountable though.
My excitement grew as I realised that a climb from this side of the mountain may actually be possible, and I might even go down in Abels history for the first western ascent of Mensa Moor! I continued to scramble upwards for a kilometre or so and it became apparent that whilst it was possible, there would be an amount of "bush-bashing" required. The risk was that I had no idea of what I would face on the way up to the summit, as there is no record of a western ascent to refer to. My topographical map showed areas of light-dense scrub, combined with open plateau and scree fields, along with what appeared to be some very close contour lines representing pinchy climbs for certain, with the likelihood of steep cliffs to negotiate!
I decided that the worst that could happen is I meet an obstacle along the way I can neither go over or around and have to turn back. Nothing ventured, nothing gained. If I failed it was merely a dose of humble pie! I headed back to the car as darkness was falling my reconnaissance was done for the day. I were richly rewarded for the day's antics by watching Mensa bathed in an orange sunset disappear in the rear view mirror. I excitedly spoke of returning to conquer this Abel with friends a few weeks down the track. That "few weeks down the track", however, was to turn into the next day, such was my enthusiasm to see if it could be done!

Me taking compass bearings and planning the route using my map and what I could sight ahead. Photo Credit: Natalie Bevis
Now misery loves company and so I thought I would put some feelers out to our close hiking friends to see if any of them felt like a wander into the unknown in head-height scrub the next day. Three of our friends joined me - Natalie (Natty), Haydyn ("The Athlete") and Lance (Sir Lancealot). Fortune favours the brave and although we didn't know it at the time our western summit of Mensa Moor would chart a route that halves both the time and distance required to complete this Abel. A western ascent also almost completely avoids the many scorparia fields, poorly drained flats, exposed plateaus and constant scree fields, that give Mensa Moor its less than savoury reputation.
An early start had us parked on the fire trail we had located the day before at around 8am. It was time to get the maps and compass out to confirm the bearing we had set yesterday. Ben would be carrying his trusty Garmin Inreach/GPS as a backup, but today was all about using a map and compass and trusting in the bearings to get us to the summit, whilst also allowing for deviations because of the topography of the land. We set the initial bearing taking aim at a small valley in between the distant rockfall and cliffs we could see on the western side of the summit plateau. Our collective thinking was that this small valley would allow for the easiest passage onto the plateau itself.
We began the morning's hike by following the disused fire trail for about 500m before entering the scrub. The initial part of this scrub descended down a shallow gully towards the creek. This time of the year - and after considerable rainfall and snow melt - the creek was too deep to cross by wading through, so we headed to where we had found a large felled tree the day before.
Descending the gully to the creek wasn't terribly hard going and was only a short distance, but the ground was sodden from recent rain and hidden by dense ferns and moss, so made for slippery going. Upon reaching the creek we used the large fallen tree to cross. It kept our feet dry but was extremely slippery due to the moss cover. During the summer months the creek would most likely be simply waded across - or jumped over - without even dipping your toes!

The small creek crossing. Photo Credit: Haydyn Bevis.
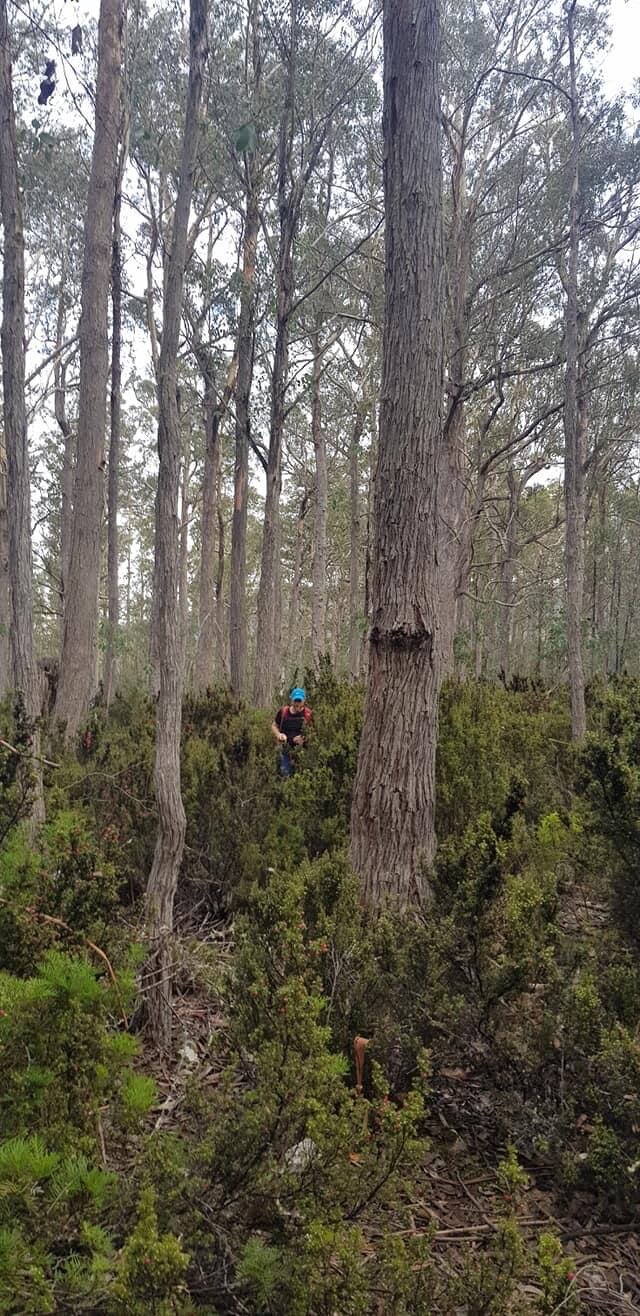
Following the creek crossing we immediately begin to rise up towards the plateau. For the first 2-3 km the scrub is dense but not impossibly difficult to wind through, ranging from waist to head high at times. Periodically more than a gentle effort was needed to make headway, and then clear pockets would appear for quite easy climbing. As we no longer had a line of sight to the summit we were regularly ensuring we were on track with our compass bearing. Small deviations around denser shrubbery were taken but always coming back to our initial bearing. With absolutely no track and no vision of our destination one could easily wander in circles without a map and compass!
As the elevation increased the scrub opened up to much easier walking, with far less bush bashing! We came upon an old creek bed so used the water worn rock path for more comfortable hiking. We concentrated on staying together as it was easy to lose sight of each other in the denser scrub. At times one or the other of us might go slightly ahead to save the others hiking on if a turn around was necessary. The elevation was climbing steadily, but given our pace was slower to negotiate the terrain, it was in our opinion pretty easy going.
As we felt the rise start to level out the terrain changed from dense scrub to rock scree up ahead. Once again we rechecked our bearings to ensure we were still on course. We were looking forward to a change of terrain and we all love a little scree hopping!

Rock breaking up the scrub. Photo Credit: Haydyn Bevis.
Initial scrub sections were easy to navigate through. Photo Credit: Natalie Bevis
The first scree field we were to happen upon was easy to navigate and overcome due to the almost perfectly climb-able size of the boulders! They were dry and stable - always a positive! Even Haydyn who was nursing a slightly wounded ankle was able to confidently cross this scree field by using his hiking poles. We could see rising above us another, larger scree field and a partially scrubbed rock line heading upwards. We chose to follow the partially scrubbed line and in hindsight it would have been easier, faster and safer just to have continued on the scree. Lesson one for today.
Our decision to stick to the scrub line for the next jump in elevation rather than via the adjoining scree field seemed sensible at the time, as the scree appeared much steeper in incline and some of the boulders quite large. It appeared from our vantage point we could easily clamber the plateau via the scrub line. How wrong we were! What we could not see until we were climbing it was that the scrub was surrounded by dead leaves, extremely slippery ground cover and it was exceedingly steep! For every step you took, if you were not hanging on to the ground cover of small bushes with your hands you could easily have slipped down. Not fall to your death down, but inconveniently down! Lance and I lead this section and moved relatively fast to see what was ahead just in case we needed to turn around. It would save the others climbing all the way up for no reason.

Natty starting up the first scree field. Photo Credit: Haydyn Bevis
As we finished the climb through the last part of the dense scrub, the view to the summit plateau unlocked and we could see the terrain change to a mixture of large boulder fields and extremely dense wooded bush. But we could also see the nook our bearing had correctly led us to - the opening in the cliff to reach the summit plateau. We all started to get quietly excited.
One final boulder climb and energetic push to the plateau! This section took some serious negotiating. Finding a correct balance between the large boulders and the virtually impenetrable wooded bush. Lance led this section weaving us to the top in a semi-direct path. The boulders were dry and not particularly slippery, but at times they gave out to hard trees and impassable scrub, so a slight course adjustment was needed. This was probably the most bothersome and time consuming part of the trek.
As we neared the summit plateau the elevation climbed quite steeply but we were all having more than a little fun finding paths up the boulders, and at the same time turning around to enjoy the views that were surrounding us. We could see the Mazda parked on the fire trail in the far-off in the distance!
Yay! The summit plateau! And what a beautiful plateau, littered with small tarns. Here, careful foot placement was needed as one's foot would sink into the boggy marsh if not placed correctly, or one might slip on an ice-crusted tarn. Now that we were on the plateau we could finally see the true summit of Mensa Moor across the marsh. We were second guessing ourselves as surely it couldn't be this easy to get to the summit on Mensa Moor? Everyone we had spoken to had literally never wanted to return, such was the lack of enjoyment they gained from the hike there. I rechecked my map, and yes, according to her calculations the summit in the distance was indeed our goal. Still, we thought maybe we were wrong? It seemed far too easy, far too quick? I pulled out my Garmin InReach GPS and confirmed we were almost there.

On the Mensa Moor plateau. Photo Credit: Haydyn Bevis
Heading towards the true summit we could just make out the cairn that Abel Zane refers to and is pictured with marking the goal for the day. Many a hiker has devotedly trudged to Mensa Moor only to stand on a false summit - cairned and all. The actual summit holds a larger and distinctive cairn, and lies approximately 900m further towards the far south-eastern corner. In the distance some spectacular scenery was calling our name! Our collective steps hastened, so close we could taste success! The plateau was open and exposed and we had already increased our warm layers, but a welcoming cup of coffee awaited us at the summit.
In under three hours we had reached the summit of the 'dreaded' Mensa Moor, which as it turns out isn't that bad from the western side at all! The five of us had forged a little bit of Abel history and it was time for the rich rewards - Money? Book deal? Day time TV interviews? Nope! Humble coffee and cake!

Looking towards Magnet Crag and the Rodway Valley. Photo Credit: Haydyn Bevis
One last appreciation of the marvelous views from the summit and it was time to leave. Still kicking ourselves that we had done it, that it was indeed possible and that it wasn't actually that demanding, we began our homeward journey back to the car. The wind had increased now and the cold change had settled in, so we made haste to the junction in the cliff that we had entered the plateau from. Tracking back was easily done with the map and compass but alternatively we all have Garmin/Suunto watches which have a wonderful track-back feature!
We took nothing for granted though as it would be easy to start the descent in the wrong spot and end up having to climb back up and re-find the crack in the cliff line that was so handy in our ascent!
The decent, unpredictably, was easier than the climb up and we proceeded rapidly down. We had planned ahead to make one slight change to our route on the return. Instead of negotiating the steep and slippery scrub line on our return journey we would instead use the scree to our advantage.
Off the scree fields now and the final roll down the hill towards the creek. Back to a little bush bashing. It is surprisingly harder to bush-bash downhill than it is to do the same uphill. There were many giggles as we took turns tripping over the underbrush and face planting.
Less than 500m to the car and the smiles were impossible to hide. We all had a real sense of achievement and the others were also not so secretly relieved that I had not led them in circles. My navigation skills prior to my navigation course in the Blue Mountains were famous for being underwhelming to say the least!
Back at the car, warm, fresh clothes on and a picture of Mensa Moor in the background. What an epic adventure we had proving that what can't be done, can be! In fact, with an up-and-back return trip taking just over 5 hours - at a very conservative pace - we had more than halved the average time to do this Abel. Given some of that time involved playing it safe and checking and rechecking our coordinates if this route became a taped or cairned route then it could easily be completed in well under 5 hours return. Perhaps one day other intrepid hikers might choose to conquer Mensa Moor from the west and it may become the recognised route!

Mensa Moor summit. Photo Credit: Natalie Bevis
The stats.
Distance: Approx. 10 km out-and-back.
Time taken: About 5 hrs, including numerous short stops.
Difficulty: Moderate, some tricky sections to negotiate, but on the whole not difficult.
Type of track: Completely off-track, mix of eucalypt forest, dense scrub, scree fields and alpine moor.
Access from: Disused fire trails leading off Fisher's Tier Road.
(After turning right on Fishers Tier Road continue on for approximately 6.8km. Then turn left at “Sign 2” onto Fishers Tier #5 road. After 4.7km swing left and follow to a widened area suitable to park cars.) Note these are old forestry roads and as such may be blocked by fallen debris, undriveable or gated into the future.

A “Xing devised” route taken to Mensa Moor (from the west).