Mount Emmett
Date: 5th January 2020 – Summit: 1410m

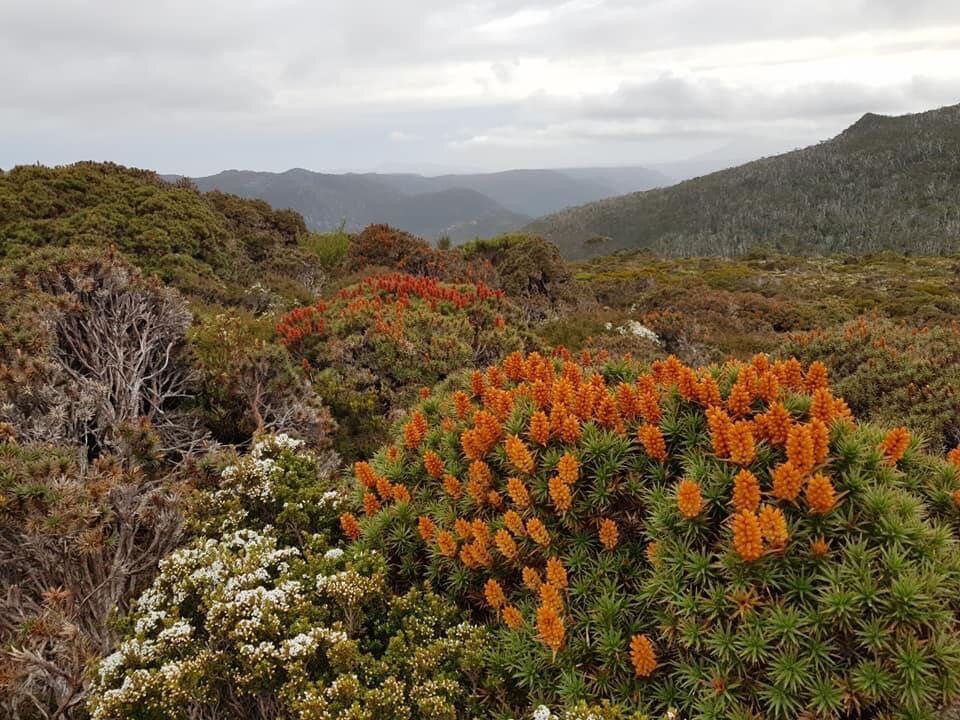
Mt Emmett summit area. Photo Credit: Lynnda Coffey
Mt. Emmett had been on my mind for a while. Ever since a spring trip into Waterfall Valley had turned into a full blown snow mission - rendering Mt. Emmett impossible - I had been hankering to get back and climb it. Glancing over to Mt. Emmett from Cradle Cirque I had frequently remarked that it appeared as if a giant had emptied a huge bag of rocks out and the rubble had landed in one big pile. Like a sand castle made of big rocks instead of sand. Of course it wasn't a giant but the immense power of ice in our geological history that we have to thank for giving us Mt. Emmett.

Mt Emmetts rocky mass. Photo Credit: With thanks to Ben Young.
The Launceston Walking Club (LWC) had included Mt. Emmett on its latest walking calendar and I was keen to walk with them again. They were going to enjoy a night‘s camping at Little Plateau before making an ascent of Mt. Emmett the following day. I had prior commitments and as such would not be able to join them for the night but instead arranged to meet them at 7:30am near Kitchen Hut on the Overland Track.
I had our good friend and fellow Abel bagger Lynnda to keep us company and we set off bright and early from then Dove Lake car park just as dawn was breaking. The morning was crisp and a heavy mist was settling so we stopped briefly at Kitchen Hut to layer on our wet weathers preventing any dampness creeping through and chilling us. Even with a stop for clothing changes we made fast time to the meeting spot with the party from the LWC.
We love walking with the LWC because their collective wealth of knowledge on everything bushwalking is amazing and they generously share it. Steve our leader had a good plan for the day as he had previously attempted Mt. Emmett twice - inclement weather turning him back both times. It was such a pleasure to wander the OLT with them and listen to the history of the National Park and have them point out areas they had been to that are not regularly visited. The day before they had climbed Fury Divide Prospect as the weather had been too bad for Barn Bluff. Our party of nine happy bush walkers continued along the OLT until we reached the junction to the Scott Kilvert Hut.

The small hill hiding Mt Emmett. Mt Emmett just in view behind it. Photo Credit: Ben Young

On top of the small hill with Mt Emmetts massive scree field hiding in the mist. Photo Credit: With thanks to Lynnda Coffey.
Stepping off the OLT onto the Lake Rodway Track that leads towards the Scott-Kilvert Hut we could clearly see the unnamed low hill we would need to cross before approaching Mt. Emmett. We would not be dropping down the valley to the Scott-Kilvert Hut but rather traversing the ridge that joins Cradle Mountain and Mt. Emmett. From here onward the hike would be "untracked". That said there is a plethora of pads, both human and animal that lead almost to Mt. Emmett’s rocky base!
Rather than try to skirt around the low hill it is simple enough to climb straight over it on your way to Mt. Emmett. There are many naturally formed shale paths leading to its high point and the views from the top make the short climb entirely worth it. With this unusual vantage point we could see to the south west Cradle Cirque's many cliff faces with running waterfalls. To the north east a spectacular view of the rear of Cradle Mountain’s summit and Little Horn as well as the crystal blue water of Lake Rodway in the valley below.
As is nearly always the case when you have a birds eye view you can see tracks and paths much clearer and this was true when standing on top of the unnamed peak. Even though the eastern side of the hill had a denser coverage of scrub the way across the ridge between it and Mt. Emmett was visibly obvious. We set off down the hill. Steve was happy for me to lead the way down off the hill and I love a choose-your-own-adventure!
Scoparia in full bloom. Photo Credit: With kind thanks to Lynnda Coffee.
Reaching the bottom of the hill the scrub became denser still with a generous amount of scoparia. However almost all of the scoparia between the hill and the snow gums that form a band in front of the base of Mt. Emmett can be avoided by sticking to the obvious pads towards the northern edge of the saddle. Weaving in and out of multiple pads we made fast progress over the saddle. When the pads became less distinct in sections it was merely a matter of looking "down through" the scrub to the ground below where the pads again became visible. Mt. Emmett‘s summit was still shrouded in mist at this stage and we were hoping it would lift.

The visible scree field - there is more behind that! Photo Credit: With thanks to Lynnda Coffey.
After passing an obvious and isolated boulder we reached the small band of snow gums that form a wall around the base of Mt. Emmett‘s scree fields. Here the pad disappeared briefly before becoming obvious again after only a few minutes of forceful pushing. Back in low alpine heath we continued on the pad which ended at a small dried tarn, a perfect spot for morning tea before the scree climb!
Mt. Emmett is a majestic pile of rocks at first glance but closer inspection reveals twin rock pile peaks connected by a saddle of boulder scree. The closer north-western peak is the lower one and the true summit lies on the more distant south-eastern peak. Both peaks hold a summit cairn and they even look surprisingly similar! The 1410m true summit was our goal however.
It made sense then that we traverse some of the distance via the base before entering the scree. This would be quicker and easier. Then our plan was to climb just high enough on the boulder field to be above any green belt but not so high as to waste time and energy on elevation gain to only have to drop down in between the two peaks. Once in the boulder saddle between the two peaks we would ascend to the true summit. A sideways climb of sorts!
We quickly understood why Mt. Emmett is a fair weather mountain! The endless boulder climb consisted of very generous sized rocks with the majority of the boulders being covered in black moss. Fine for us today in the dry conditions we were enjoying but they would be a nightmare if wet. I was taking care with picking a path occasionally having to back track momentarily when met by boulders too big for my little legs to get over. Still, in a little over 40 minutes we had reached the green base of the final climb to the summit.
We had less than 100m to reach the summit and the day had been thoroughly enjoyable and certainly not hard in any manner. To our delight the sun was now shinning fully and the mist had lifted. Yay - views! After crossing a small scrubby section between the two rocky peaks we began climbing the boulders once again choosing the best possible path up and over the large rocks.

Some of the crew on the summit area. Photo Credit: With thanks to Lynnda Coffey
Given Steve was our fabulous leader for the day we thought he should touch the holy grail that is the summit cairn first. Third time is a charm and he had a big smile on his face to have it in the bag. One by one we thanked the mountain and reached the top. The views from the top of Mt. Emmett were glorious. Many of the OLT's stars were on show - Barn Bluff, Mt Ossa, Pelion West to name just a few. To the south the many lakes on view were dotted like bright blue jewels in the landscape. It was lovely to enjoy the sun on our face, the endless views, good company and a tasty snack. Whilst enjoying everything the summit had to offer we decided as a group instead of just heading off home, we would head over to the second peak to check out the views from there.
About 20 minutes later we were soaking in yet more spectacular views but this time from the false summit cairn on Mt. Emmetts north-western peak. It was well worth the short detour as we were now privvy to views not able to be seen from the true summit. It was time to call our day to an end and begin the scree shuffle down off Mt. Emmett. We all agreed upon finally reaching the base that we had made the right decision sidling around Mt. Emmett before climbing to the summit.
An added bonus to viewing the false summit was that as we descended it we found multiple King Billy Pines thriving in the isolation. The trees would have to have been many, many hundreds of years old according to Steve. From this elevated point the cliff band of Cradle Cirque looked beautiful. We were being thoroughly spoilt today!
The return journey from the base of Mt. Emmett was a simple matter of retracing our steps and we soon stood at the junction of the OLT and the Lake Rodway Track once more. A few of the LWC considered a quick climb of Barn Bluff given the day was so glorious but decided to return with us to their campsite and have a good excuse to visit the area again in the future - not that one ever needs an excuse to visit one of the most beautiful parts of the world.

Summit views. Photo Credit: With thanks to Ben Young
The stats.
Distance: Approx. 23km out and back from Dove Lake car park.
Time taken: 10 hours including lunch and numerous photo stops.
Difficulty: The Abels book classifies Mt. Emmett as a "hard" day walk. Whilst it is a long day and does involve considerable scree, we would classify this Abel as moderate at worst, definitely not hard.
Type of track: Tracked as far as the Lake Rodway Track, then off-track with obvious pads for much of the route to final scree approach.
Access from: Dove Lake car park.

Route taken to Mt Emmett