Mount Hobhouse
Date: 19th September 2020 Summit: 1222m

Lake King William and Overland mountains such as Olympus and Gell. Photo Credit: Ben Young
Sometimes I find just reaching the mountain you wish to climb is a challenge enough, given that many of the access roads are owned by Sustainable Timber Tasmania, Hydro Tasmania and/or on private property. The Abels describes a route to the summit of Mount Hobhouse from the north-west but mentions access to the track proper is via the good graces of Hydro Tasmania, a precious key and a hydroelectric dam. Most walkers, when unsuccessful in obtaining the key, slog up Mt Hobhouse's eastern side. All the accounts I have heard from friends about an eastern ascent have been just plain wretched. So the challenge was set - get the key! Many phone calls, a little sweet talking and general cajoling later and the prized key was in my hot little hands. Yippee! Time to visit one of the more remote Abels in Tasmania.

The dam. Photo credit: Ben Young
Why not watch & read?
Please enjoy a visual trip to Mount Hobhouse in addition to the blog below. Whilst the blog gives you greater detail on the trip (including route information) the video allows those that may never reach its summit a virtual experience.
Tucking the key for the gates that block access across the Hydro-controlled Clark Dam into the centre console of the Mazda, we headed south late one Friday night as is our usual MO these days. I had invited my fellow hiking buddies Ben Young (known from here on in as Ben Y ) and Cathy along as they had unsuccessfully attempted the climb from the east the week before. Ben's twin sister Stephanie would be joining our merry of band of walkers and they would meet us at 7am the next morning. I arrived at the Clark Dam about 9pm and set about pitching my new car-tent in the clearing near the jetty. It felt like luxury being able to sit back with a coffee and watch the Milky Way and star show above me before turning in for the night.
Rising to the promise of clear skies, I quickly packed up the tent and drove to the large yellow gate that blocks access to the dam to wait for Ben, Cathy and Steph. I was nervous about driving over the dam - having never driven over one before - before but also excited for the days adventure to begin.
We knew once over the dam we would drive up the short, steep 4WD track up to a parking area situated by a small installation. Cathy drove on first so I could lock the two gates (there is a gate either end of the dam) and Ben Y would occasionally jump out the car to remove the odd bit of forest litter on the road. A few minutes later we were parked and ready to start the day's explorations with our usual day pack items secured on our backs.

The small parking area across the dam and up the fire trail.

Me stopping to take a zillion photos of the lake. Photo Credit Ben Young.

Lake Views.

More lake views.
Our adventure would begin at around the 770m contour thanks to the road access up the steep 4WDtrack. Back tracking a few metres down the 4WD track we located the old bombardier track that would lead us towards Lake King William. There was much tongue tripping over the proper pronunciation of "bombardier" and its origin. We settled on "bulldozer" track as the closest descriptive. The track was obvious, spacious in places, a little crowded by scrub in others, but easy to follow. So discernible was the track that the occasional pink ribbons we spotted along the way weren't really needed. Within 10 minutes we were on the driftwood-strewn shores of the lake. One couldn't help but stop and enjoy the sights across the lake to a snow brushed King William Range and Slatters Peak over to our immediate west. We could have spent all day here just taking photos and exploring the waterline, fully laden with endless driftwood carcasses.

The cairn leading towards the log book.
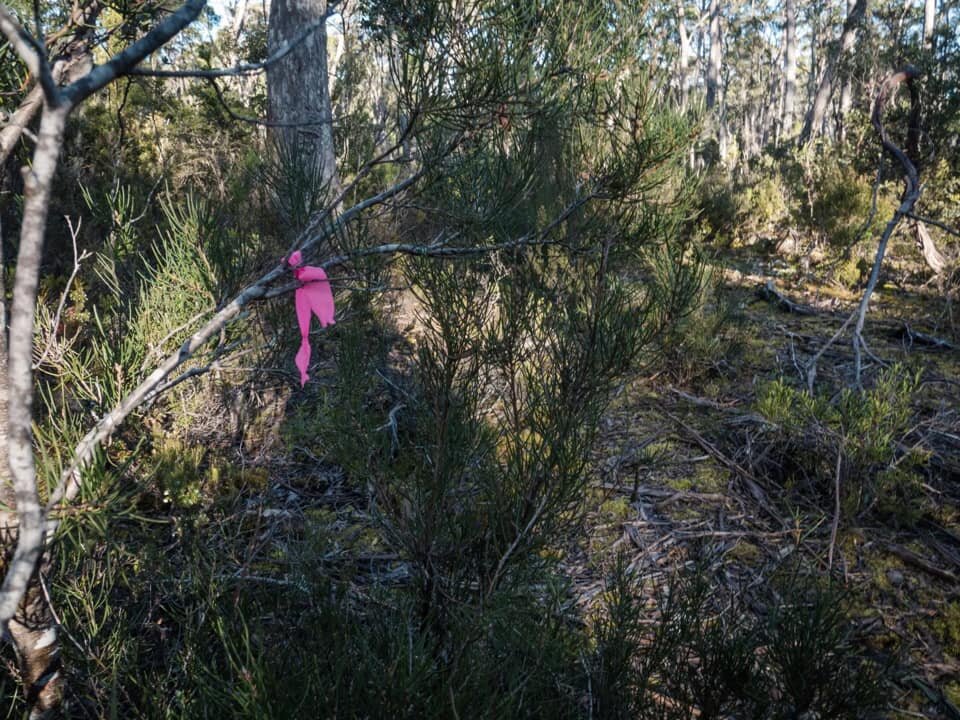
Pink ribbon marking the start of the trail just past the cairn.
Leaving Lake King William behind us the track turned briefly south-sou-westerly for a few hundred metres before again turning south-west and led us through wet sclerophyll forest towards the southern end of Guelph Basin. After less than two kilometres we had reached the log book and signed in, noting that the lack of entries that this really is not a well visited Abel. Perhaps it is access issues that prevent visitation, because certainly Mt. Hobhouse has a reputation for rewarding views. Once again the bombardier track was so observable that the tape markers were almost rendered obsolete. The sun was on our back, the climb was only very gradual and other than a few minor boggy sections our feet were even dry!

Button grass time. Photo Credit: Ben Young
As the climb gently progressed the terrain changed and we arrived upon a small button-grass plain. The panorama towards the King William Range from here literally stopped us in our tracks and had us clicking away on our cameras. How spoilt were we?! Easy walking, sunny, cloudless and views for days. The button grass tufts were low enough that crossing the plain wasn't difficult but here the pink tape markers were more scarce. Nevertheless, crossing the button-grass plain towards a finger of scrub on our south-western side allowed us to pick up the track and tape again. I could imagine a snake or two hiding in the tussocks come summer - and I was hoping to see one given the warmness of the day - but sadly I was out of luck. The closest I would get was one of the many leeches present on this hike.

Entering the spectacular rainforest.
The track continued to be both well-marked and worn and so we were not needing to expend any energy on navigating. All our combined research had indicated that we need not even consider leaving the bombardier track until about 500m past the creek crossing we would reach further along - that's what everyone else seems to have done in the past.
The track was now heading through some of the most impressive old growth myrtle rainforest we have ever seen. Everything was green and furry. Textures and shades burst from every possible surface and giant trees with humungous bases stood proud or covered massive expanses of forest floor where they had fallen. Oh to witness the thunderous sounds and earth rocking shudders as they hit the ground!
We reached the unnamed creek crossing and again stopped just to immerse ourselves in the beauty surrounding us. We were enjoying the easy walking and pink tapes maybe a little too much as we would make our only navigational mistake for the day at this point. As mentioned previously our research indicated that we would leave the obvious bombardier track about 500m after a sharp turn in contours past the creek. We would then use the ridgeline to access the summit.
Given the pink tape was still leading us along the bombardier track and we hadn't gone past the sharp turn we didn't feel the need to second guess our research and all the route markers? After all both tapes and cairns were now leading along the bombardier track. WRONG.
In hindsight we realise we left the bombardier track a little too late and should have ignored the pink tape leading us along it! We all failed to spot a second route leading off the bombardier track to our left - it too marked with pink tape (which in fairness isn't immediately obvious where as the misguiding tape is blatantly obvious!). The cairn on the edge of the bombardier track was also no more significant than the other cairns along it as it appeared to have been toppled over and definitely did not indicate a direction change. On reflection we should not have gone around the large bend as everyone seems to but instead left the track before it.
As a result of following the wrong tape lines we left the bombardier track too late and were now on an untracked climb up the ridge. The walking was still easy at this stage as it was open rainforest, but I was eager to get us back towards the taped route. Luckily we located it after a few hundred metres as it saved us from what could have been a miserable untracked bush-bash to the top!
PRO TIP: In order to get on the easy and well marked "official track" make sure that after crossing the unnamed creek you take a sharpish left immediately. Here the trail will shortly lead you alongside a large fallen tree on your right hand side and approx. 100m after the tree (about 350-400m all up from the creek) you will see a larger cairn on your left hand side ( we added a few rocks back onto the cairn that had obviously been toppled in the past somehow) . Look up and deep into the forest and you will see a pink ribbon. This is your cue to leave the bombardier track. Do NOT continue to follow the false leads along the bombardier track. You can thank us later ;-)
Now back on the extremely well marked track we were climbing properly for the first time in the day. Not steeply, but consistently. We wandered past huge tree ferns, more giant myrtles and sassafrass - all of us pleasantly surprised at how easy the day's walking had been thus far. We were now tracking south-eastwards and it was obvious that someone had recently performed some degree of track maintenance. Sections were freshly taped and some scrub had been cut back a little. Thank you to whomever has gone to this effort in preserving this route.
The delightful rainforest eventually succumbed to heavily wooded and denser scrub including bauera. In some sections we needed to climb over forest litter or clamber across larger boulders and small rocky outcrops that lay in the forest. The scrub then changed once again, and for a brief section became fantastically dense. Pink ribbons continued to lead us thorough this dense section though and allowed for passage through the path of least resistance. The elevation was climbing too and this was the only real section that I finally felt some mountain in the mountain!

An evocative section with tea tree, bauera and cutting grass. Photo Credit: Ben Young
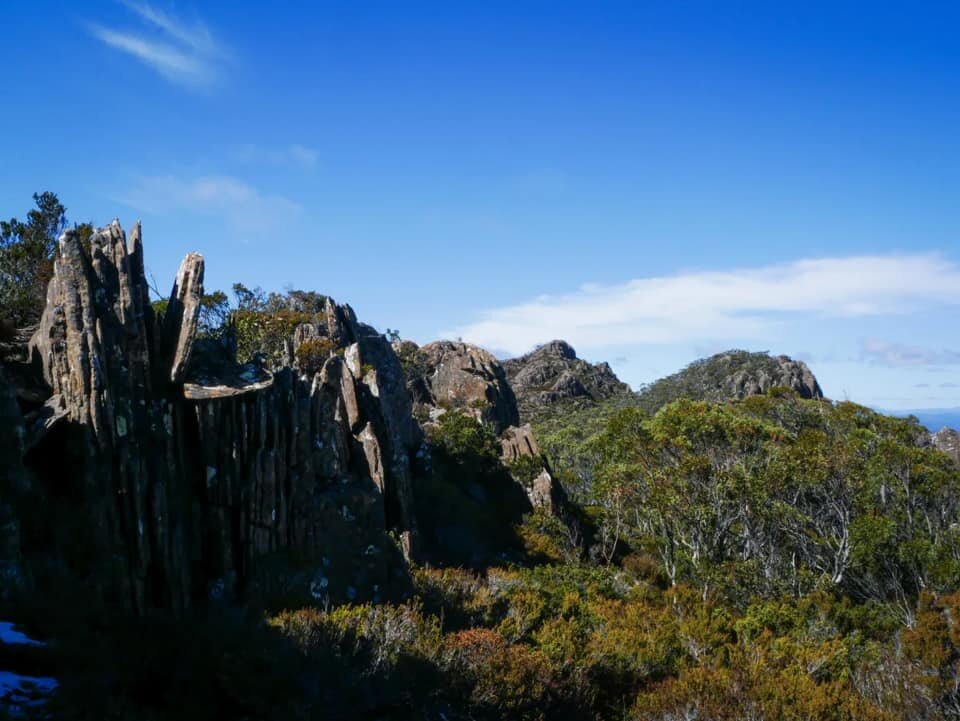
We were now moving up the ridgeline with Mount Hobhouse's northern-western rocky knoll visible for the first time through the trees. Climbing steeply we continued on through a mixture of scrub and rock with an obvious pad made more so by the kind person who has actually cut back some of the intrusive vegetation. Just below the knoll we stopped to catch our breath and admire the clear views of the King William Range.
Cairns now supported our journey along the pad. Passing below the northwestern knoll we were careful to not be eager and climb onto the ridge too early, least we make it harder on ourselves than necessary. Sticking to the pad would eventually lead between two high rocky outcrops, and we finally breached the ridgeline. In the distance to our south-east we could see the knoll that held the summit. But it was the views to our south-west that held us enthralled - The Spires in all their glory. Ben Y got particularly excited, as these Abels are generally regarded as the most remote and challenging to get to!
Initially the pad disappears but the walking is easy due to low scrub.
Behind the rocky knolls looking towards the summit now.

Another view looking towards the summit from the saddle below it.

Getting closer to the summit. Photo Credit: Ben Young
Heading off in the direction of the summit we used the well defined pad until... it ran out. Or rather, it got completely obscured in scrub. Given it was a clear day and we could sight the summit high point this wasn't vexing any of us. I led the way using the plethora of animal pads available until we were again on the semi-obvious pad. The walking was easy as the vegetation was lower alpine heath. We headed directly for the rock slabs and scree across the small vegetated section. It took us just over 20 minutes from rounding the first knoll onto the summit plateau to reach the summit itself, which indicates how easy the walking was for the final section. We had been previously told this final 500m section was 'absolutely delightful' to walk, and would have to agree!
Arriving at the rocky terrain that would carry us to the summit we passed by the occasional cairn but they were totally unnecessary really. Crossing the rock slabs between the final two small outcrops was easy and a short scramble had us touching the summit cairn in under 4.5 hours, even with all our stops to admire the views and take photos. I got there first so got to enjoy the views and take some photos before the others arrived.

The summit cairn!
We had spent the morning leisurely walking, climbing, chatting and enjoying the views on offer. We had also until this point thought the views very fine indeed. Well. We. Were. Gobsmacked. WOW. The views from the summit were heavenly - 360 degree heavenly. Every which way we looked we were spoilt. Uninterrupted views of the entire King William Range, Diamond Peak, Prince of Wales Range, The Spires, The Denison Range, Wylds Craig, Wentworth Hills, the Gordon River and even the Wellington Range. What was most amazing was that all of these far mountains felt close. Although a great distance separated us from them they felt and appeared so close that one might believe you could stretch your hand out really far and touch them!

Not a bad view for lunch!

Feeling on top of the world. Photo Credit: Ben Young
The weather gods were shining on us and so there was nothing more to do for now than enjoy a piece of birthday cake to celebrate Ben and Steph's birthday. Where would you rather be to celebrate, really? Reluctant to leave, we spent a good 45 minutes sunning ourselves and appreciating how truly lucky we are in Tasmania. But alas, it was time to put our packs back on and head homewards. A mighty fine mountain, a fine day and some very fine company. This is what adventures are made of for sure.
The stats.
Distance: Approximately 17.5km. We all had varying distances on our watches or Garmin InReach devices - averaging 17-19km between us.
Time taken: Approximately 9 hours in total. Our moving time was only 7 hours but the remainder was a leisurely lunch at the summit and numerous stops to admire the breathtaking views constantly opening up around us.
Difficulty: We would classify the route taken as medium in difficulty. It is a relatively easy track for the most part to follow but the distance does mean that it is a longer day on foot.
Type of track: Tracked to summit but the track is skinny or overgrown in some sections. Ribbons and cairns mark the entire route until the summit plateau, then pads allow for the final ascent to the summit.
Access from: Clark Dam off Butlers Gorge Road.

Route taken to Mt. Hobhouse via Clark Dam.